
Embarking on a journey to reset your MacBook Air? This blog post is your go-to guide on How to Reset MacBook Air! Whether you aim for a fresh start or troubleshooting issues, the process is simplified here. We’ll walk you through backing up your crucial data, signing out of services, and utilizing Recovery Mode to erase and reinstall macOS. It’s an easy-to-follow roadmap for resetting your MacBook Air and ensuring a seamless experience. Let’s dive into the steps, ensuring you safeguard your data while giving your device a much-needed refresh!
Here Is the Complete Guide on Resetting Your Macbook Air

Backing Up Your Data: Safeguarding Your Digital World
The first and most critical step before initiating any reset is to back up your data. This ensures that your important files, documents, and memories are preserved and quickly restored after the reset. Follow these simple steps:
External Drive or Cloud Service
- Connecting an external drive or utilizing a reliable cloud service like iCloud or Google Drive.
- Transfer all crucial files, documents, photos, and any other data you wish to preserve to the external drive or cloud storage.
Also See: Asus Zenbook 14 OLED (UM3402) vs Apple MacBook Air (M2, 2022)
Signing Out of iCloud, iTunes, and Other Services: Preparing for a Smooth Reset
Before diving into the reset process, it’s essential to disconnect your MacBook Air from various services to avoid complications. Here’s how you can do it:
➡ System Preferences
- Open “System Preferences” on your MacBook Air.
- Navigate to and click on “Apple ID.”
- Sign out from your Apple ID to disassociate your device from iCloud services.
➡ iTunes or Music
- Open iTunes (or Music on macOS Catalina and later).
- Deauthorize your computer to prevent any authorization conflicts later.
➡ Other Accounts
- Ensure you sign out of other accounts, such as iMessage and FaceTime.
Booting into Recovery Mode: Initiating the Reset Process
Now that your data is safely backed up and your MacBook Air is disconnected from various services let’s proceed with entering Recovery Mode:
➡ Restart in Recovery Mode
- Restart your MacBook Air.
- During the reboot, hold down the “Command + R” keys until you see the Apple logo, indicating you’ve successfully entered Recovery Mode.
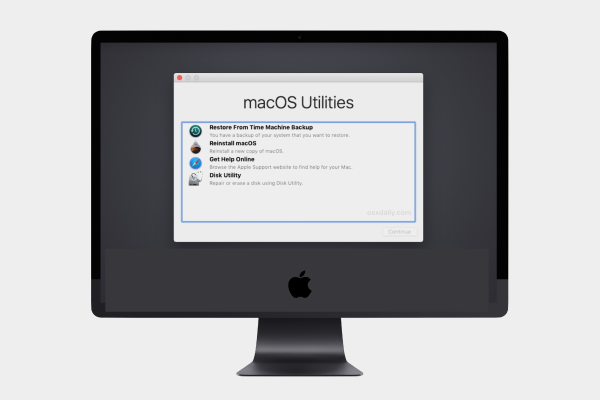
Accessing Disk Utility and Erasing the Hard Drive: Preparing for a Clean Slate
With Recovery Mode engaged, it’s time to access Disk Utility and erase your hard drive:
➡ Disk Utility
- In Recovery Mode, select “Disk Utility” from the available options.
➡ Show All Devices
- Click on “View” in the menu bar.
- Choose “Show All Devices” to ensure you can see your internal hard drive.
➡ Erase the Hard Drive
- Select your hard drive under the “Internal” section.
- Click on the “Erase” button.
- Choose the appropriate format for your macOS version – either APFS (High Sierra or later) or Mac OS Extended (Journaled) for older macOS versions.
- Confirm the action by clicking “Erase.”
Reinstalling macOS: Bringing Your MacBook Air Back to Life
Now that your hard drive is formatted let’s proceed with reinstalling macOS:
➡ Reinstall macOS
- Exit Disk Utility and select “Reinstall macOS” from the Utilities menu.
➡ Follow On-Screen Instructions
- Follow the on-screen instructions provided during the reinstallation process.
➡ Restoring Your Data: Bringing Back the Familiar
- As you complete the macOS setup, you’ll reach a point where you can restore your data:
➡ Complete Setup
- Finish the macOS setup process, including language, region, and user account creation.
➡ Restore Data from Backup
- During the setup, you can restore your data from the backup you created earlier. Follow the prompts to bring back your files and settings seamlessly.
Conclusion
Congratulations! You’ve successfully reset your MacBook Air, ensuring a fresh start while preserving your essential data. Remember, these steps are general guidelines, and it’s always advisable to check for any specific instructions or updates from Apple based on your MacBook Air model and macOS version.
