In today’s digital world, Android smartphones are indispensable, seamlessly integrating with Google accounts to access essential services. Nevertheless, managing multiple Google accounts is common to leverage various features. Fortunately, adding and managing numerous accounts is straightforward on Android devices.
This tutorial focuses on How To Add Multiple Google Accounts on Android, maximizing productivity by enabling users to access crucial resources without limitations. By exploring the process of adding multiple Google accounts, users can optimize organizational efficiency and unlock their device’s full potential.
Here is a complete Guide on How to add multiple gmail on android
Recognizing the Advantages of Several Google Accounts
➡ Improved Structure: Users can categorize their digital lives by using multiple Google accounts to quickly distinguish between business, personal, and other activities. By assigning distinct accounts to various facets of their lives, people may stay focused and clear, which improves their overall productivity and organization.
➡ Enhanced Privacy: By keeping personal information separate from business or shared accounts, users can increase their security and privacy. People can reduce the chance of unintentional disclosure or sharing of sensitive information by separating it into different accounts, protecting their reputation both personally and professionally.
➡ Access to Numerous Services: Users who add numerous Google accounts have unrivaled access to a wide range of services and programs. Whether using Gmail for email management, Drive for document collaboration, Calendar for event scheduling, or YouTube for video streaming; users may easily transition between accounts to take advantage of a wide range of Google services catered to their own requirements and tastes.
Also See: How To Monitor and Control Data Usage on Android Phone
How to add multiple gmail on android phone

Step 1: Access the Settings On your Android device, look for the Settings icon, which is usually a gear or cogwheel. Tap the Settings icon to access the Settings menu.
Step 2: Scroll down the Settings menu until the “Accounts” or “Accounts and Sync” option appears. To view the account settings, tap on it.
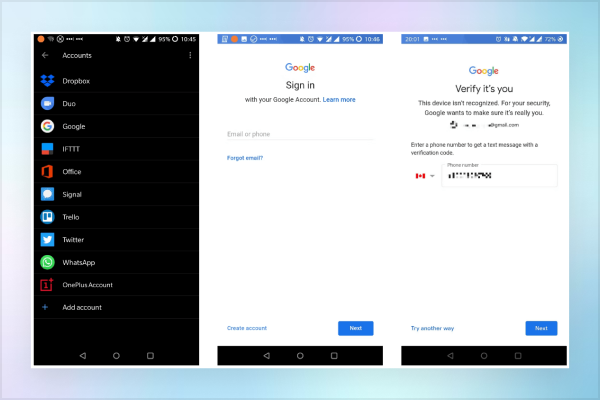
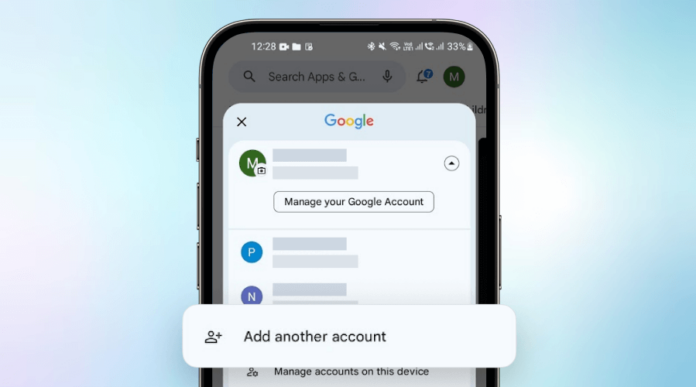
Step 3: From the Accounts menu, select “Add Account” by tapping it. A list of account types will appear. To add a new Google account, select “Google” from the list.
Step 4: You’ll be asked to input your new Google account’s login information, which includes your email address and password. Enter the necessary data precisely and move on to the following stage.
Step 5: Your Android smartphone could ask for permission to access specific services and data related to the recently added account after you enter the account details. Examine the permissions being asked for, then click “Allow” or “Accept” to provide access as needed.
Step 6: Your device will verify adding the new Google account once the account data have been successfully entered and permissions have been granted. It’s possible that you’ll get a message or notification letting you know the account was successfully added.
Handling Several Accounts
1. Changing Accounts
With your Android device, you may quickly switch between several Google accounts by going to the Settings menu and choosing “Accounts.” With a few touches, you may effortlessly switch between your personal, professional, and other accounts by selecting the account you want to use from there.
2. Setting Default Account
You may streamline your digital workflow by giving different services and apps a default Google account. Find the “Set Default Account” option in the Settings menu under “Accounts.” This will streamline your user experience by automatically associating tasks like writing emails or saving files with the selected default account.
3. Eliminating Accounts
Reduce the number of pointless Google accounts on your device and streamline account administration. To delete an account, go to Settings > Accounts and choose the account you want to delete. To make sure your device only keeps the accounts that are necessary for you, use the “Remove Account” option from the account settings.
Advice for Effective Account Administration
1. Account Naming
Give your accounts meaningful names to improve organization and clarity. Whether it’s naming accounts “Personal,” “Work,” or classifying them according to particular projects or activities, having distinct and unambiguous names makes it easier to navigate and manage multiple accounts.
2. Sync Configuration
Personalize the sync settings for every account to ensure that data and services are synchronized in a way that suits your needs. Look through the choices in the account settings menu to manage which information is synchronized between your devices—like contacts, calendars, and emails. You can maximize storage capacity and bandwidth utilization by fine-tuning sync settings while guaranteeing that critical data is always available.
3. Security Points to Remember
Put strong security measures in place to give account security a top priority. Turn on two-factor authentication (2FA) to reduce the possibility of unwanted access by adding an additional layer of security on top of passwords. Furthermore, keep a close eye on account activity to spot any unauthorized or questionable behavior. To protect your accounts from potential security risks and to maintain the privacy of critical information, be watchful and proactive.
Conclusion
Ultimately, becoming proficient in the process of connecting numerous Google accounts to Android devices can lead to increased efficiency and simplified digital administration. Users may quickly arrange their digital life, move between personal and professional accounts, and access a wide range of Google services by following the easy instructions provided in this guide.
By utilizing the adaptability of several accounts, people can customize their digital experiences to meet their own requirements and tastes, which opens up new possibilities for ease and efficiency. Take advantage of the ability on how to add multiple Google accounts on Android devices to transform how you interact with the internet today.

