
In the intricate dance of laptop performance, the unsung hero often resides within the compact confines – the graphics card. This vital component dictates the visual prowess of your device, influencing everything from casual browsing to intense gaming sessions.
However, as technology advances, so do the demands of modern applications, leading users to contemplate the upgrade route. Unveiling the secrets of a successful How to Upgrade a Laptop Graphics Card not only promises a potential boost in performance but also opens the door to a world where gaming and graphic-intensive tasks become smoother, more immersive experiences.
Here is a complete guide on How to Upgrade a Laptop Graphics Card
1. Compatibility Check
- Significance of Compatibility
- A mismatched graphics card can lead to compatibility issues, hindering overall system stability and performance.
- Compatibility ensures seamless integration, allowing the upgraded graphics card to work harmoniously with the laptop’s existing components.
- Finding Current Graphics Card Model
- Navigate to the Device Manager on your laptop.
- Locate the “Display Adapters” category to unveil your current graphics card model.
- Research and Selection
- Examine your laptop’s architecture and specifications.
- Choose a graphics card compatible with the laptop’s slot type, power supply, and physical dimensions.
2. Gather Necessary Tools and Materials
- Tools for the Upgrade
- Precision screwdriver set for disassembly.
- Antistatic wrist strap to prevent electrostatic discharge.
- Thermal paste for optimal heat dissipation.
- External components, brackets, or adapters if needed.
- Specific Graphics Card Model
- Choose a graphics card compatible with your laptop’s architecture and specifications.
- Ensure any additional components, such as brackets or adapters, are on hand.
3. Backup Important Data
- Importance of Data Backup
- Safeguard critical files from potential loss during the upgrade process.
- Ensure a smooth transition without compromising personal or professional data.
- Backup Methods
- Utilize external hard drives, cloud storage, or both for a comprehensive backup.
- Schedule automatic backups to maintain an up-to-date copy of your data.
4. Prepare the Laptop
- Safely Power Off
- Close all running applications and initiate a proper shutdown from the Start menu.
- Unplug the power cord from the laptop.
- Disconnect the Power Source and Remove the Battery (if applicable)
- For laptops with removable batteries, safely remove the Battery to ensure a complete power disconnect.
Also Read: Choosing the Perfect Laptop for Graphic Design
5. Disassemble the Laptop
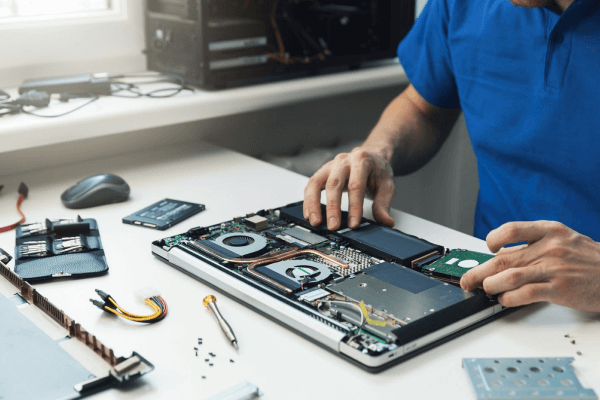
- Open Laptop Case
- Gently pry open the laptop case using precision and care.
- Avoid using excessive force to prevent damage to the case or internal components.
- Handling Screws
- Organize screws meticulously to simplify the reassembly process.
- Use small containers or labels to categorize and keep track of each screw’sscrew’s location.
- Accessing Existing Graphics Card
- Identify and remove any additional components obstructing access to the graphics card.
- Proceed carefully to expose the existing graphics card.
6. Remove the Old Graphics Card
- Safe Removal
- Detach any securing mechanisms, such as screws or clips, holding the old graphics card in place.
- Gently lift the old graphics card from its slot, avoiding excessive force.
- Static Damage Prevention
- Handle the graphics card with care to prevent static damage.
- Use an antistatic wrist strap and work on a static-free surface.
7. Install the New Graphics Card
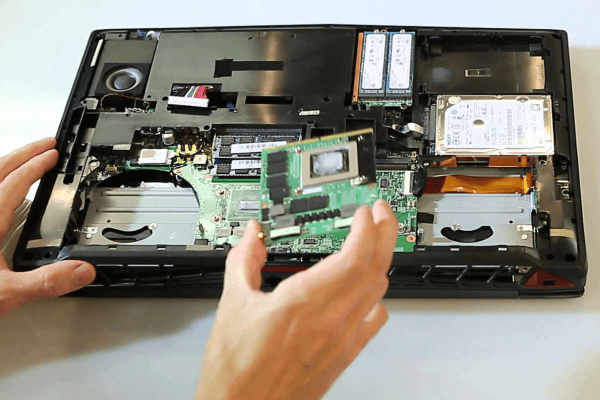
- Align and Insert
- Align the new graphics card with the slot on the motherboard.
- Gently insert the graphics card, ensuring a snug fit.
- Securing in Place
- Use screws, brackets, or other securing mechanisms to affix the new graphics card to its slot firmly.
8. Apply Thermal Paste (if required)
- Thermal Paste Application
- Apply a pea-sized amount of thermal paste to the designated area on the new graphics card.
- Ensure even spreading for optimal heat dissipation.
- Importance of Proper Application
- Proper thermal paste application is crucial for preventing overheating and ensuring stable performance.
9. Reassemble the Laptop
- Step-by-Step Reassembly
- Follow the reverse order of disassembly to put the laptop back together.
- Connect all components securely and tighten screws appropriately.
- Verification
- Double-check all connections and ensure no components are left unsecured.
- Confirm that screws are tightened but not overly so to avoid damage.
10. Power On and Test
- Powering On
- Power on the laptop and observe for any signs of issues, such as unusual sounds or error messages.
- Driver Installation and Testing
- Install the latest graphics card drivers.
- Test the system’s performance with graphic-intensive tasks or games to ensure the successful integration of the new graphics card.
FAQs
1. How to Change a Laptop Graphics Card?
To change your laptop’s graphics card, power off and prepare your device. Gather essential tools, back up data, and systematically disassemble the laptop. Safely remove the old graphics card, install the new one, and apply thermal paste if required. Reassemble the laptop, power it on, and test for optimal performance.
2. What tools do I need to upgrade a laptop graphics card?
Gather a precision screwdriver set, antistatic wrist strap, thermal paste, and, if needed, additional components like brackets or adapters.
3. Is it necessary to back up data before upgrading a graphics card?
Yes, it’s crucial. Backup important data to avoid loss during the upgrade process, using external hard drives or cloud storage for a secure transition.
4. How do I check if a new graphics card is compatible with my laptop?
Verify your laptop’s specifications, including slot type, power supply, and dimensions. Research and select a graphics card compatible with these requirements.
5. Do I need to apply thermal paste when installing a new graphics card?
If required, apply a small amount of thermal paste to ensure optimal heat dissipation. Follow our guide on when and how to apply it for a smooth upgrade process.
Conclusion
In the symphony of how to update a laptop graphics card, each step plays a crucial role. As you embark on this journey, remember the potential improvements awaiting – a smoother gaming experience, enhanced graphic-intensive tasks, and an overall boost in performance.
Your diligence in compatibility checks, careful disassembly, and precise reassembly pave the way for a successful upgrade. Take your time, follow safety precautions, and revel in the satisfaction of unlocking your laptop’s laptop’s true graphical potential. If uncertainty looms, seek professional help for a flawless encore in your laptop’s laptop’s performance.
