When it comes to computers running Windows 11, Ethernet connection are the most reliable and fast ways to connect to the internet. On the other hand, people often need help setting up their Ethernet links. These problems, like rapid disconnections and slow speeds, make it hard to work and do things online.
Because smooth networking is so important, this blog is meant to give Windows 11 users a complete guide on how to solve and fix Ethernet connection problems. Users can get back control of their network connections and enjoy a smooth online experience by looking at common problems and giving step-by-step answers.
Here is a guide on how to fix a broken ethernet connection on Windows 11
1. Check the connections physically
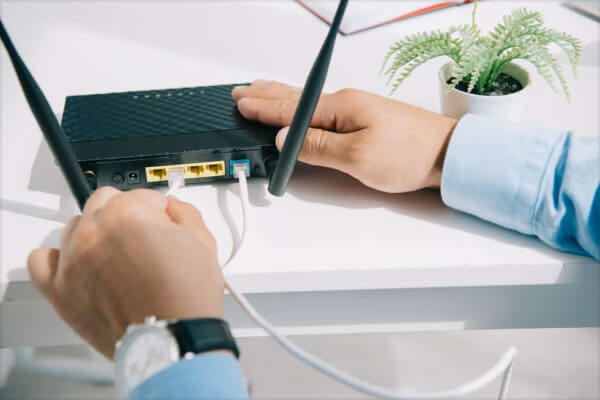
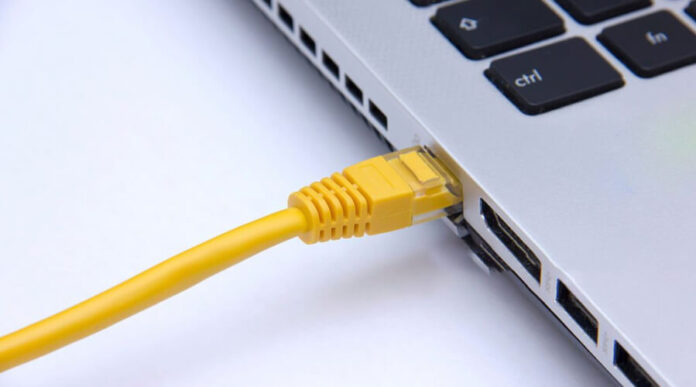
When fixing Ethernet connection on Windows 11, it’s very important to make sure that the actual connections are stable. First, make sure that the Ethernet cord is securely plugged into both the computer’s Ethernet port and the router or modem’s Ethernet port. A weak link can cause problems with communication from time to time.
You should also look at the wire for any damage signs, like splitting or bending. Even small flaws can stop signals from traveling and make the network unstable. Through careful inspection and protection of physical links, users can get rid of possible Ethernet problems and make networking go more smoothly.
2. Restart your network and PC equipment
- Restarting your Windows 11 PC may often resolve issues when software has momentarily disrupted the Ethernet connection.
- To restart, choose Restart from the Start menu after clicking the Power button.
- You unhook your router or modem from the wall, wait 30 seconds, and then plug it back in. This is known as power cycling.
- In addition to clearing off any temporary memory or configuration issues obstructing the Ethernet connection, this procedure resets the router or modem.
- After restarting the computer and any connected network devices, make that the Ethernet connection is operational once again.

3. Update Network Adapter Drivers
- Launch Device Manager. Right-click the Start menu and choose “Device Manager” from the menu.
- Click the arrow next to “Network adapters” in Device Manager to expand it.
- Go to network devices and locate your Ethernet adapter. The box may state “Ethernet controller”.
- Right-click the Ethernet connection and choose “Update driver” from the menu.
- Select Let Windows find new driver software.
- After that, Windows will search online for the latest Ethernet driver software.
- Follow the on-screen instructions to download and install an updated driver.
- After updating, restart your computer to view the changes.
- Ensure the Ethernet connection works after restarting.
Also See: How to Fix 5G Not Working On Your Phone
4. Reset TCP/IP Stack
- Right-click “Command Prompt” in the Start menu and choose “Run as administrator.”
- Insert netsh winsock reset into the code Prompt box and hit Enter.
- Enter netsh int ip reset after performing the first command.
- Press Enter after typing ipconfig /release in the Command Prompt to release the IP configuration.
- Clear the IP address using ipconfig /renew and Enter.
- After these procedures, restart your computer to apply the modifications.
- Make sure that the Ethernet connectivity works after restarting the machine.
5. Disable and Re-enable the Ethernet Adapter
- Enter “Control Panel” into the Start menu search box. Choose the search result to open the Control Panel.
- Click “Network and Internet” in the Control Panel.
- The “Network and Sharing Center” button opens network settings.
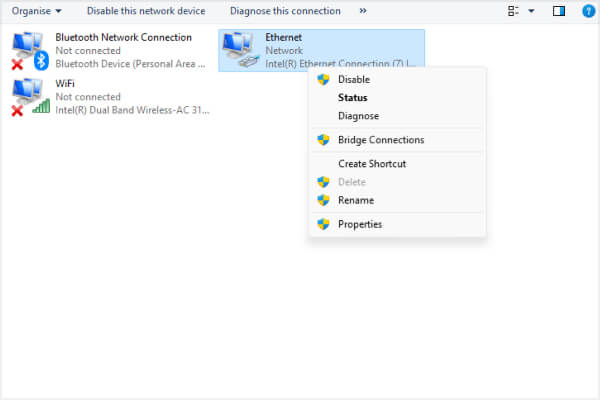
- Click “Change adapter settings” on the left to view all its links.
- Right-click the Ethernet connection you desire from the network devices list.
- From the context menu, choose “Disable” to temporarily disable Ethernet.
- Wait a second or two to switch off the adaptor fully.
- To switch on the adapter again, right-click the Ethernet connection and choose “Enable”.
- Make sure that the Ethernet connection works after turning on the adapter.

6. Check your network settings.
- To get to the Settings menu, press the “Settings” (the gear icon) button in the Start menu.
- To change settings for your network, find “Network & Internet” in the Settings window and click on it.
- Select the Ethernet choice from the screen on the left to make sure it is turned on.
- To make sure the Ethernet link is set up properly, look at the information shown, like the IP address, subnet mask, and router.
- Pay close attention to any trouble messages or warnings that might mean there are problems with the setup.
- Check the proxy settings to make sure they are set up properly and won’t get in the way of the Ethernet link.
- Turn off any proxy settings if you don’t need them for your network setup.
- Check the network settings and make any necessary changes. Then, close the Settings window and see if the Ethernet link works again.
7. Run Network Troubleshooter
- To get to the Settings menu, press the “Settings” (the gear icon) button in the Start menu.
- To handle system changes and fix different problems, go to “Update & Security” in the Settings window.
- To get to the debugging choices, choose “Troubleshoot” from the menu on the left.
- Find the “Internet Connections” troubleshooter under “Find and fix other problems” by scrolling down.
- First, click on “Internet Connections” to start the troubleshooter.
- Follow the on-screen instructions and let the troubleshooter figure out what might be wrong with your Ethernet link.
- Any problems that the troubleshooter finds will be tried to be found and fixed instantly.
- The troubleshooter will give you suggestions or steps to follow in order to fix the Ethernet link.
- Close the Settings window and check to see if the Ethernet link is back up and running after the troubleshooter is done.
Also See: 11 Effective Tips For Public Wi-Fi Hotspot Security
8. Verify DHCP Settings.
- For administrative access, find “Command Prompt” in the Start menu, right-click on it, and choose “Run as administrator.”
- Type the command ipconfig /all into the Command Prompt window that comes up and press Enter.
- The information shown will give you information about your Ethernet device, such as its IP address, subnet mask, and default port.
- Dynamic Host Configuration Protocol (DHCP) should be used to see if these network settings are changed on the fly.
- If the IP address, subnet mask, and default router are mentioned as being instantly gotten, that means that DHCP is running and setting these things up.
- Make sure the IP address is in the area that your network expects and doesn’t clash with any other devices.
- If DHCP isn’t turned on or the network settings look wrong, you might need to set up TCP/IP settings by hand or look into DHCP problems further.
- After making sure the DHCP settings are right, close the Command Prompt window and see if the Ethernet connection works.
9. Test with Another Device
Connect the Ethernet wire to something else, like a laptop or a different computer, to find out where the problem is coming from. It’s likely that the problem is with the original computer’s network setup or hardware if the other device can join properly.
10. Check for Bugs in the Hardware
If the repair steps don’t fix the Ethernet link, run more tests to look for hardware problems. Test first with a different Ethernet wire or by plugging the router or modem into a different port. If the problem keeps happening, it could mean that the hardware is broken.
This could be caused by a problem with the computer’s network connection or router. At this point, it’s best to get help from a professional to figure out what’s wrong and fix it. In some cases, the only way to get an effective Ethernet connection back is to replace the broken hardware part.
In Conclusion, fixing problems with an Ethernet connection on Windows 11 requires a methodical technique. We’ve talked about a number of steps, such as checking the hardware links, installing the latest drivers, and doing network tests. If the problems don’t go away, trying with different cords and devices can help find physical problems.
Remember that if you need more help, you can get expert support or look at online groups. To protect against losing data while debugging, you should also make system changes a priority and keep regular backups. Users can fix Ethernet problems and keep connecting to the internet on their Windows 11 computers by following these steps and being strategic.

